↗️ RepositoryA full convolutional neural network.
Introduction and Why
In one of my deep learning courses, we had the opportunity to implement a Convolutional Neural Network (CNN) from scratch in Python. This was a great learning experience, as it walked through all the key components a CNN uses when classifying MNIST digits like convolutional layers, max pooling, fully connected layers, ReLU activations, SGD for optimization, and dropout for regularization. That project really got the gears turning for me. It helped me understand how each part of the architecture contributes to learning spatial hierarchies in image data, and how even a relatively small network can achieve surprisingly high accuracy on MNIST with the right setup. In this note, I'll be breaking down and describing that process step by step (while also trying to keep it interesting).
Understanding the MNIST Dataset and History
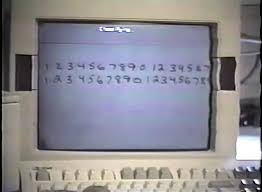
So the MNIST dataset is a classic benchmark in the world of computer vision. It consists of 70,000 grayscale images of handwritten digits 60,000 for training and 10,000 for testing. Each image is 28x28 pixels and represents a digit from 0 to 9. What makes MNIST such a great starting point is that it's simple enough to visualize and understand, yet still complex enough to show off the power of neural networks. MNIST actually has some cool history behind it too, it was made most famous by Yann LeCun, one of the "godfathers" of deep learning, back in the 1990s while he was working at AT&T Bell Labs.
As a side note if you haven't read The Idea Factory, go read it. seriously.
At the time, building a neural network that could read digits was a cutting edge task. There was no Pytorch, GPUs, Jupyter Notebooks or any other modern layer of abstraction we have today. Just a some solid C code (the original weights were stored as array literals in C!) and an idea. MNIST became the standard go to dataset for testing image classification models, and honestly, it's still holding strong all these years later.

As for the the input data its already pretty clean, no color channels, no strange formatting, which makes it easy to work with. Each pixel value ranges from 0 to 255, and we typically normalize these to be between 0 and 1 before feeding them into the network. The labels are integers from 0 to 9, and during training, they're often one hot encoded so the model can predict a probability distribution across all ten classes. Without a doubt, modern models can hit over 99% accuracy on MNIST. It's kind of a rite of passage at this point, a tried and true dataset for learning, experimenting, and testing out new ideas. In this case, it's the perfect playground for implementing a CNN from scratch and seeing how each layer transforms the input.
What makes up a Neural Network?
This is a super deep topic so I'll try to keep the nerd speak a minimum.
Before we get started, we can review what even is a neural network. Essentially a neural network behaves just like we'd expect a neuron to do, learn from data and make classifications about data. Neural networks and neurons build on top of perceptrons, which are just simple binary classifiers. So these perceptrons are pretty useful but they can't solve problems such as the XOR function (non-linearly separable) which points us to Multilayer perceptrons. These are almost extended perceptrons to handle non-linear decision boundaries. Through this, our XOR problem can be tackled by breaking it into simpler, linearly seperable components (OR and AND). And if you can see where I'm going with this, these MLPs leverage the universal approximation theorem to model these given continous functions. This then points to gradient descent, backpropagation (chain rule), activation functions, and cost functions and so on.
Basic Neural Network Components:
- Input Layer: Receives raw data.
- Hidden Layers: Process and transform inputs.
- Output Layer: Produces final predictions.
- Neurons: Basic units that compute weighted sums.
- Weights & Biases: Parameters adjusted during training.
- Activation Functions: Introduce non-linearity (IE: sigmoid, ReLU).
- Loss Function: Measures prediction error.
- Training Algorithm: Typically gradient descent with backpropagation.
Differences in Convolutional Neural Networks (CNNs):
- Convolutional Layers: Use filters to extract spatial features from data (IE: edges in images).
- Pooling Layers: Reduce spatial dimensions and computation (IE: max pooling).
- Local Connectivity & Weight Sharing: Enhance efficiency by focusing on small regions and reusing filters.
- Designed for Spatial Data: Particularly effective for image and video processing, while basic neural networks are more general-purpose.
Like I said, it can get pretty deep, and trying to keep this as digestable as I can to all readers, let's run through the rest and jump into the code.
CNN Architecture
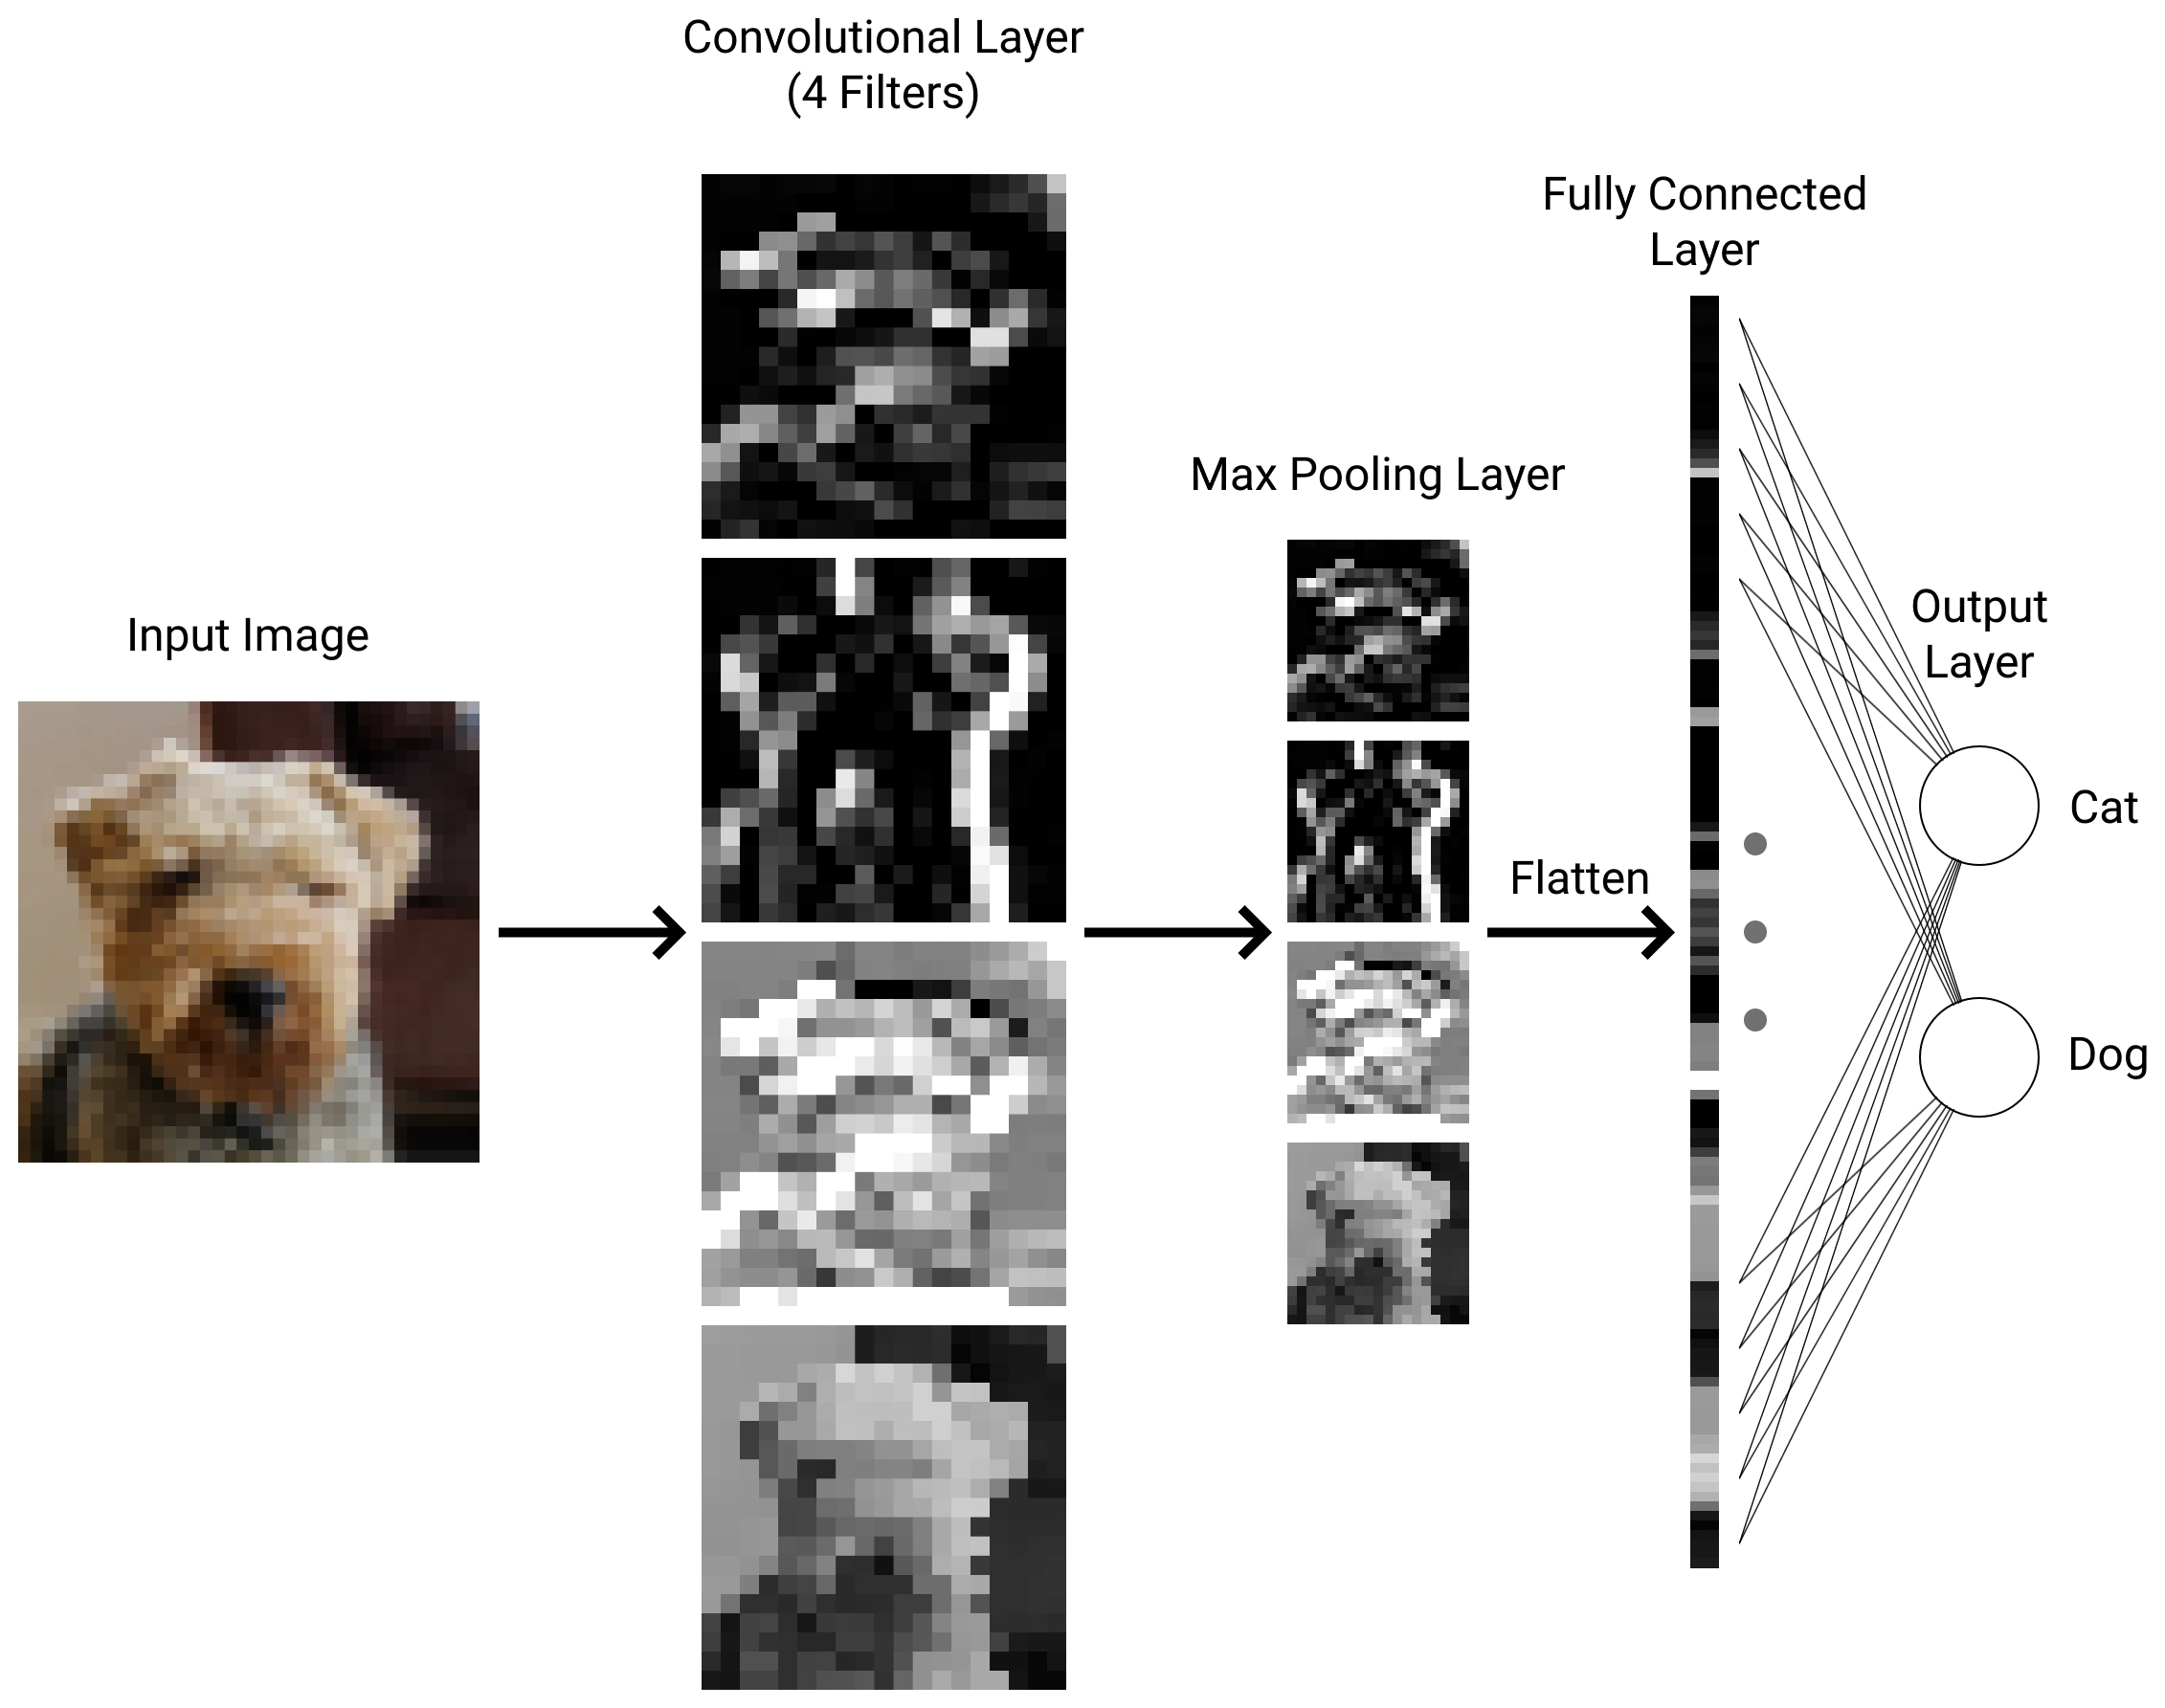
Now let's break down the CNN architecture I used for classifying MNIST digits. Since the images are relatively small and the dataset is clean, we don't need anything too fancy just a few well-placed layers can get us really solid performance. The input to the network is a single channel (grayscale) 28x28 image. The first layer is a convolutional layer, which applies several filters (like 3x3 kernels) across the image to detect simple patterns edges, corners, and textures. After each convolution, we apply a ReLU activation to introduce non-linearity. This helps the model learn more complex patterns over time.
Next, we typically apply a max pooling layer, which downsamples the feature maps by taking the maximum value in each small region (usually 2x2). This reduces spatial size, adds a bit of translation invariance, and helps prevent overfitting. We usually stack another convolution + ReLU + pooling block on top of that, just to help the model go a bit deeper. Each new conv layer learns increasingly abstract features like strokes, loops, or even full digit shapes. Once we're done with the convolutional part, we flatten the 2D output into a 1D vector and feed it into one or more fully connected (dense) layers. These layers do the final classification work. I used a final dense layer with 10 output neurons (one for each digit), and applied a softmax activation to turn those raw scores into probabilities. To train the model, I used Stochastic Gradient Descent (SGD) with cross entropy loss. I also added a bit of dropout before the dense layers to help with regularization it randomly turns off some neurons during training so the network doesn't over rely on any one path.
Example CNN structure for classifying the MNIST dataset.
Talk is cheap. Let's see the code
Here's our entry point at which we load our dataset, initalize the hyper paramters for the model and load up our layers. Overall this project pushes 2000+ LOC, so this will just highlight the main.rs file.
// ./src/main.rs
use conv_nn::activation::Activation;
use conv_nn::cnn::*;
use conv_nn::mnist_impl::*;
use conv_nn::optimizer::*;

fn main() {
    // Load MNIST dataset
    let data = load_mnist("./data/");

    // Set hyperparameters
    let hyperparameters = Hyperparameters {
        batch_size: 10,
        epochs: 10,
        optimizer: OptimizerAlg::SGD(0.1),
        ..Hyperparameters::default()
    };

    // Create CNN architecture
    let mut cnn = CNN::new(data, hyperparameters);
    cnn.set_input_shape(vec![28, 28, 3]);
    cnn.add_conv_layer(8, 3);
    cnn.add_mxpl_layer(2);
    cnn.add_dense_layer(128, Activation::Relu, Some(0.25));
    cnn.add_dense_layer(64, Activation::Relu, Some(0.25));
    cnn.add_dense_layer(10, Activation::Softmax, None);

    cnn.train();
}
To close this thing up, this is a really basic implementation of a CNN for the MNIST dataset, but it really hammers down the fundamentals of building neural networks for those who want to learn more.
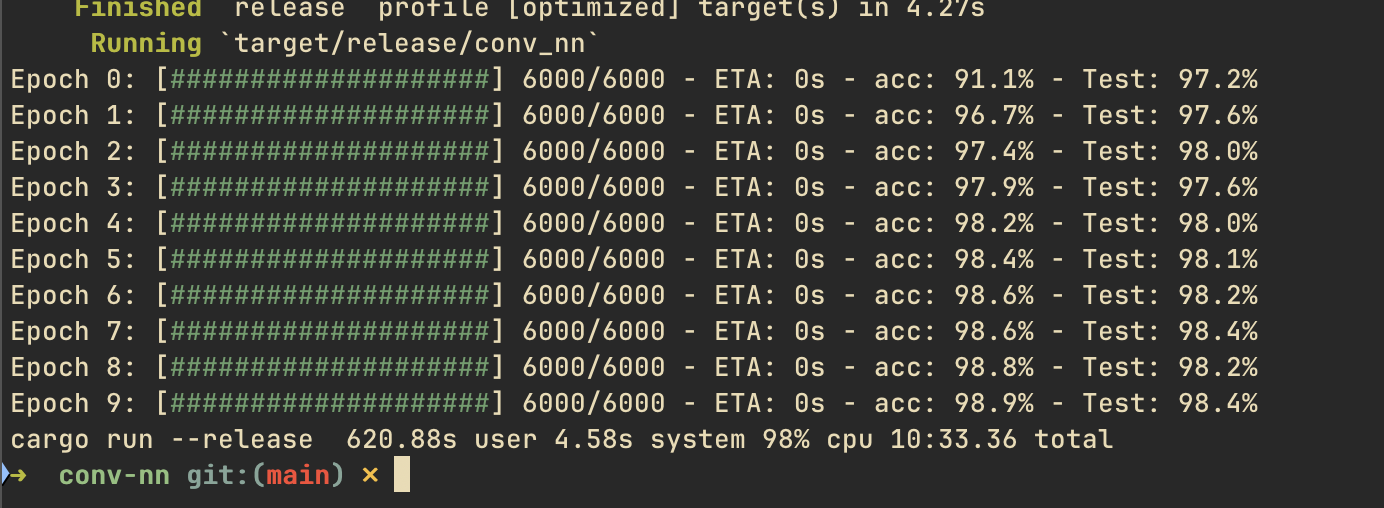
Quick Demo
As a future idea, adding parallelism would be another great experience.

You can check out the full repository below which highlights everything discussed!
https://github/tkruer/conv-nn